In this article you will learn how to link a domain to Vultr server. So, you can connect to it using a domain name rather than it’s IP address.
We will be using Namecheap domain name registrar in this article. However, the process doesn’t differ so much from one provider to another. Therefore, if you are using different registrar, you can follow the same steps, as the principle is also the same.
We very recommend Namecheap. If you are looking for a domain name, we encourage you to get it from Namecheap. Since, it offers excellent support, it has very great reputation and provide user friendly control panel.
At First, dealing with domain names seems confusing, with all the new strange terms like “CNAME” and “A Record” and others. However, it just seems more difficult than what really is. In fact, linking a domain name to your server is extremely easy as you will see in the following steps:
1- Get your Vultr server IP address
Log in to your Vultr account and navigate to your instances. Get the IP address of your server, as in the image below.

Copy your server’s IP address to the clipboard and proceed to the next step.
2- Set “A Record”
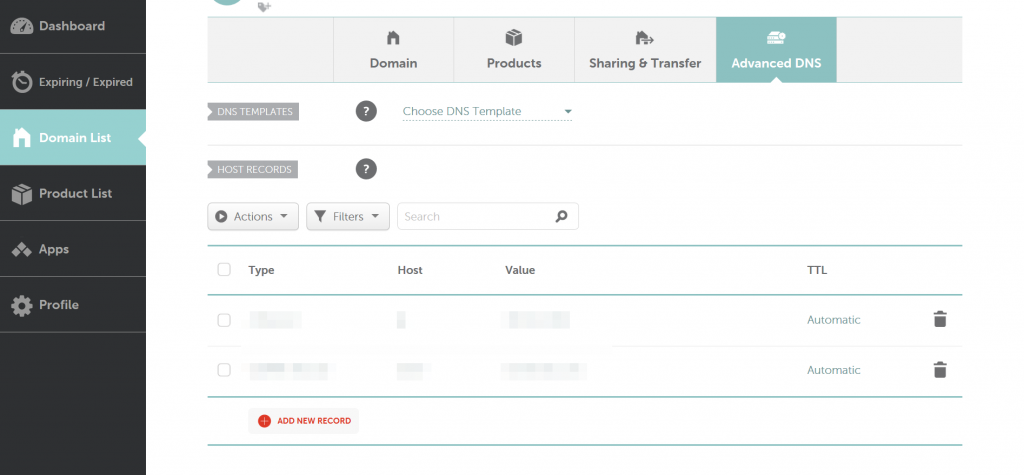
Log in to your domain name registrar account and open your domain name management page where you can find Host Records table. Namecheap has it located under Advanced DNS tab.

You, as owner, can add, edit or remove any of your DNS Host Records. So, you need to remove all existing Host Records, eventually you are going to add new. Keep in mind, that most of domain name providers does not allow you to remove all the records, leaving the table empty. In this situation, you can add your new record before removing previous ones.
Without further ado, add new record now and select “A Record” as it’s type. “A Record” stands for “Address Record”, and this is where you are going to put your server’s IP address. When you add your new “A Record” you need to fill three fields, as follows:
- Host: Type @ to specify that this record correspond to the root domain and not for any subdomain
- Value: Enter your server’s IP address.
- TTL: It is recommended to keep it as default, TTL stands for Time To Live, which correspond to how long DNS servers should keep this record in cache. You don’t need to set it manually, since, your domain registrar defaults should have the most optimized setting.
3- Set “CNAME Record”
“CNAME Record” stands for “Canonical Name”. It helps to make a DNS rule to redirect a subdomain to the root domain. For example, if a user typed (www.example.com) rather than (example.com). Setting this record will help redirect him to your root domain (example.com).
Repeating the same process form the last step. Add new record, but this time choose the type “CNAME Record” and fill the fields like the following:
- Host: Type www to specify that this record correspond to the subdomain (e.g. www.example.com) and not for your root domain.
- Value: Type your root domain plus a full stop at the end (e.g. example.com.) to redirect visitors to root domain. The reason of the period at the end is because that your root domain is just a subdomain for the root Domain Name System.
- TTL: Again, it is recommended to keep it as default. However, you can set it a value ranging form 5 mins to 30 mins for this record.
4- Give it a test
There is a misconception that DNS changes take very long time to update, but most of the time DNS servers worldwide will be updated with your new host records in matter of minutes, or may be in fraction of a second.
Connect to your server using your domain to test it out. For example, type:
$ ssh root@example.com
Or
$ ssh root@www.example.com
In both examples, if you logged in successfully to your server, congratulations, you had set a domain name for your Vultr server. And now you know how to link a domain to Vultr server.
If you want to learn how to setup a Vultr server read this article.
Share
Other articles you may find interesting
Advertisment


